Circle skirt panel layout when the pattern is wider than fabric
Turn an oversized circle skirt pattern into balanced two-, four-, or multi-panel layouts while preserving grain and seam symmetry.
 Circle Skirt Calc Team
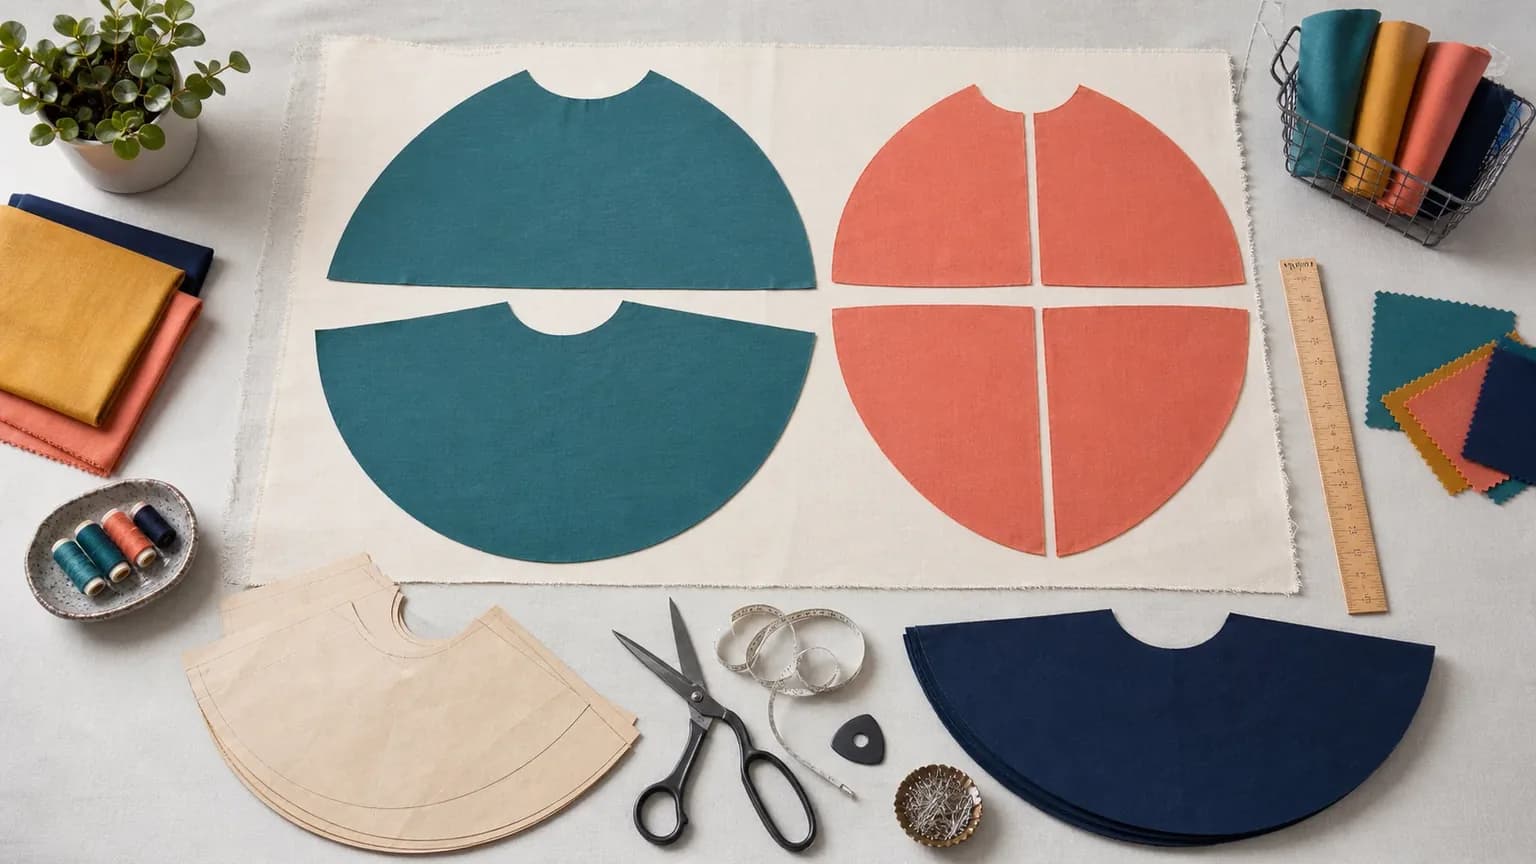
When a circle skirt pattern is wider than the fabric, plan separate panels with seam allowances and consistent grain; buying more length alone does not fix a piece that is too wide. The calculator estimates 90-degree panels in a flat, single-layer grid. A different sector split or folded layout needs its own manual plan.
Check the quarter-panel reservation first
The fabric-planning guide explains the complete estimate. Each panel reserves a square with side hem radius + joining seam allowance. Panel count is the skirt angle divided by 90 degrees. Columns are floor(usable width / panel span), limited to that panel count; rows are ceil(panel count / columns) when at least one column fits. Reserved fabric length is rows x panel span.
If no column fits, the calculator gives manual layout required, with no automatic fabric length. It does not mean 0 metres or yards. This grid assumes non-directional cloth and does not optimize nesting. Waistband, closure, shrinkage, and matching allowances are additional; the Fabric Guide summarizes those limits.
Example: one full circle, four usable widths
Keep the waist at 80 cm, ease at 0, finished length at 50 cm, hem allowance at 2 cm, and joining allowance at 1 cm. The widths below change how many reserved quarter panels fit across the cloth. They do not change the skirt's fullness.
One full-circle skirt, different fabric widths
Waist 80 cm, ease 0 cm, finished length 50 cm, hem allowance 2 cm, joining seam allowance 1 cm. Each quarter panel reserves a square about 65.73 cm wide.
| Usable width | Panels across | Rows | Fabric length |
|---|---|---|---|
| 110 cm | 1 | 4 | 2.63 m |
| 140 cm | 2 | 2 | 1.32 m |
| 150 cm | 2 | 2 | 1.32 m |
| 60 cm | - | - | Manual layout required |
110 cm
140 cm
These conservative estimates use non-directional fabric laid flat in one layer, without optimized nesting. Add fabric for the waistband, closure, shrinkage and pattern matching separately. At 60 cm, even one panel does not fit, so no yardage estimate is given. This is a calculated example, not a sewn sample.
The narrow-width case needs a separate plan. The following are possible manual arrangements, not layouts automatically calculated by the tool:
| Layout | Seam count | Useful when | Main check |
|---|---|---|---|
| Two half-circle panels | 2 | Each half fits a measured placement | Check the entire half, its allowances, and grain |
| Four quarter panels | 4 | Each quarter fits the usable width | Opposite panels have consistent grain |
| More panels | 6+ | Narrow goods or intentional design lines | Added seam bulk and motif continuity |
Convert the failed width check
- Confirm usable width with the fabric-width guide, excluding selvedges and flaws.
- Divide the circle into equal sectors before adding seam allowance.
- Add allowance to every new cut seam, but not to any edge still placed on a fold.
- Keep opposite panels mirrored so bias behavior stays balanced.
- If the print has a top and bottom, apply the directional print rules before nesting pieces.
The printed quarter template's waist curve and straight edges are seam lines. Add waist allowance toward the curve's center and joining allowance outside the straight edges; the hem allowance is already included. See the PDF line and printing instructions before using the paper template on fabric. Add waistband and closure pieces separately, and reserve shrinkage and matching space before purchasing cloth.
For a larger waist opening or longer skirt, the plus-size pattern guide connects these layout checks with waistband support and direct measurements. The same geometry applies regardless of a size label.
Changing panel count should not silently change the chosen fullness. If fabric budget is the real constraint, compare the geometry of full, half, and quarter-circle skirts as a separate design decision.
Check the radius and reserved layout in the calculator, then draw and measure any manual alternative on the actual usable width.